Tutorials
Testing a React Component That Uses Two Renderers with Jest
A focused guide to a rare React testing case: a component tree that combines react-test-renderer with React DOM. Learn why updates need the right act() boundary, how to structure a Jest test, and when a simpler test is better.
The unusual case: one test, two renderers
Most React component tests use one renderer. A test might render a component into a DOM with React Testing Library, or render it to an in-memory tree with react-test-renderer. A less common setup combines both: a component rendered by one renderer contains a child that creates a separate React DOM tree.
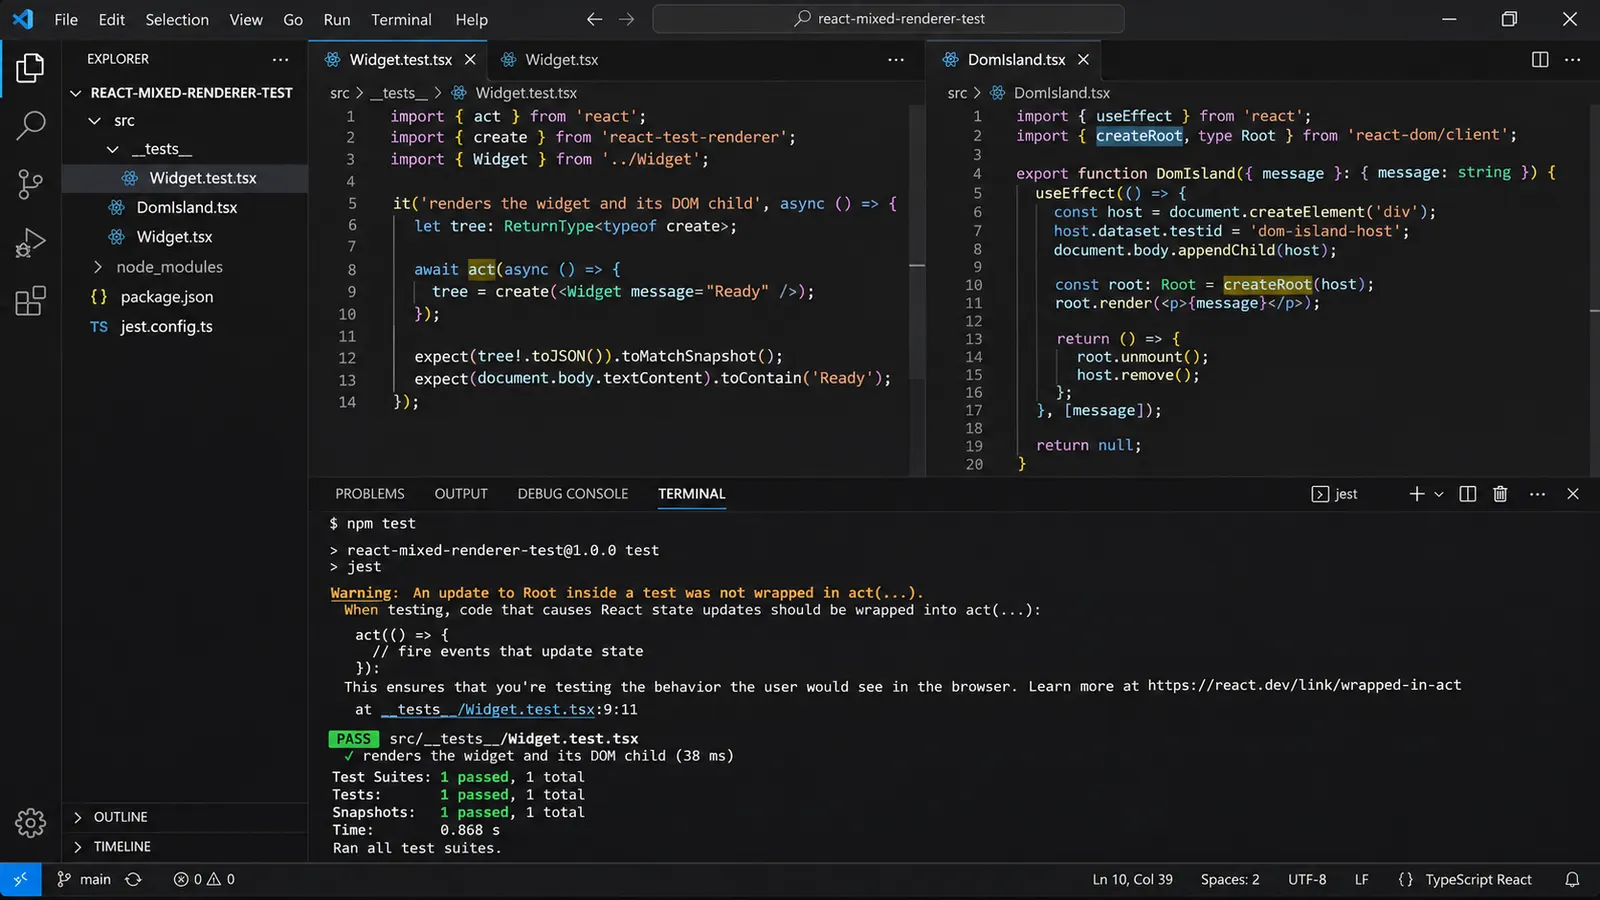
That distinction matters because the two renderers manage different roots. If an update happens in the DOM root while your test only coordinates work with the other renderer, React may report that an update was not wrapped in act(). The warning is about the update’s test boundary—not a claim that the rendered output is necessarily wrong.
This guide shows how to recognize that situation and test it without reaching into component state. It is for projects that already have a genuine reason to use both renderers. If your application does not, choose one rendering approach for the test instead.
What act() does
React updates can be scheduled rather than applied at the exact line that triggered them. An assertion made too early may observe an intermediate result. act() gives React a boundary in which to process updates and related effects before the test checks the result.
For a single renderer, use the testing library’s normal render and interaction helpers; they commonly handle the appropriate update boundary for you. In a test that directly calls renderer APIs, you may need to use that renderer’s act() API yourself. In a mixed-renderer test, keep track of which root each update belongs to and use the act() support appropriate to that renderer and your installed React version.
The React testing recipes document describes this as a rare case: a test may use react-test-renderer for a component whose child uses React DOM. The example below illustrates the shape of that setup. It is deliberately small; adapt the root creation and cleanup details to the versions of React and the renderer packages in your project.
A concrete setup
Imagine a dashboard widget whose main view is rendered in memory for a snapshot or structural assertion. A child component is an integration boundary that mounts a small DOM subtree elsewhere—for example, a legacy adapter or a component that owns a separate DOM mount point.
In production code, that child might use a React DOM root. A simplified version looks like this:
// DomIsland.tsx
import { useEffect } from 'react';
import { createRoot, type Root } from 'react-dom/client';

export function DomIsland({ message }: { message: string }) {
  useEffect(() => {
    const host = document.createElement('div');
    host.dataset.testid = 'dom-island-host';
    document.body.appendChild(host);

    const root: Root = createRoot(host);
    root.render(<p>{message}</p>);

    return () => {
      root.unmount();
      host.remove();
    };
  }, [message]);

  return null;
}
The parent can be rendered by a different renderer:
// Widget.tsx
import { DomIsland } from './DomIsland';

export function Widget({ message }: { message: string }) {
  return (
    <section>
      <h1>Widget</h1>
      <DomIsland message={message} />
    </section>
  );
}
This is not a recommendation to build components this way. It makes the renderer boundary visible so you can understand the testing problem. If the child can instead render into the parent’s renderer, the test becomes simpler.
Test the DOM behavior directly
If the behavior you care about is the text in the DOM, the most direct test is usually a DOM test. It avoids a second renderer and exercises the visible result:
import { render, screen } from '@testing-library/react';
import { Widget } from './Widget';

it('shows the message in the DOM island', async () => {
  render(<Widget message="Ready" />);

  expect(await screen.findByText('Ready')).toBeInTheDocument();
});
This example assumes React Testing Library and its DOM matchers are installed and configured. findByText waits for matching content to appear, which is useful when an effect creates the separate root after the initial render. If the content is already present synchronously in your real component, a synchronous query may be enough.
Use this approach when the user-visible result is what matters. A test should generally assert observable behavior rather than inspect private component state or internal renderer objects.
When you really need both renderers
Sometimes a project has an existing snapshot or renderer-specific test that must include the component with the DOM-owning child. In that case, the test needs to account for both roots, not merely wrap the outer render and assume that every update belongs to it.
The following sketch shows the responsibilities, not a drop-in recipe for every React version. The exact act() imports and APIs differ across React and renderer versions. Check the installed packages before copying this into a project.
import { act as reactAct } from 'react';
import { createRoot } from 'react-dom/client';
import { create } from 'react-test-renderer';
import { Widget } from './Widget';

it('renders the in-memory widget and its DOM child', async () => {
  const host = document.createElement('div');
  document.body.appendChild(host);
  const domRoot = createRoot(host);
  let tree: ReturnType<typeof create> | undefined;

  try {
    await reactAct(async () => {
      tree = create(<Widget message="Ready" />);
    });

    // The DOM child creates its own root from an effect. Wait for React work
    // and then assert on the DOM output, not on the child's private state.
    expect(document.body.textContent).toContain('Ready');
    expect(tree?.toJSON()).toBeTruthy();
  } finally {
    await reactAct(async () => {
      tree?.unmount();
      domRoot.unmount();
    });
    host.remove();
  }
});
There is an important limitation in that sketch: the DomIsland above creates and owns its own host and root; the separately created domRoot in the test is not that root. It is included to underline a common mistake: wrapping an unrelated root in act() does not automatically turn it into the root used by the component. Do not add a test-owned root unless your component actually renders into that host.
A better design for a test that must control both roots is to make the DOM host an explicit dependency. The component can receive a host element or a small mounting adapter, allowing the test to create, update, and unmount the exact root involved. That is a production design choice, not something to introduce solely to silence a warning.
For example, a component that accepts a host can make ownership explicit:
import { useEffect } from 'react';
import { createRoot, type Root } from 'react-dom/client';

export function DomIsland({
  host,
  message,
}: {
  host: HTMLElement;
  message: string;
}) {
  useEffect(() => {
    const root: Root = createRoot(host);
    root.render(<p>{message}</p>);
    return () => root.unmount();
  }, [host, message]);

  return null;
}
In practice, creating a new root every time message changes is usually not the desired lifecycle. A production implementation should retain the root for the lifetime of the host and call root.render for updates, then unmount it once during cleanup. The abbreviated component is shown to illustrate dependency injection, not as a complete lifecycle pattern.
A more testable boundary is often a small adapter that owns root creation, while the component receives a render function or an already-managed mount. That can be useful in legacy integrations, but it adds complexity. Prefer a single renderer unless the integration genuinely requires a separate React DOM root.
A practical checklist for a real mixed-renderer test
- Identify every root. Find each call to
createRoot, legacyReactDOM.render, or a renderer’screatefunction. A nested component can create a separate root even when the test only appears to render one parent. - Identify which code schedules the update. An effect in the DOM-mounted child can schedule work after the outer renderer has finished its initial render.
- Use the supported
act()API for your versions. React and renderer package APIs have changed over time. Do not mix examples from different major versions without checking compatibility. - Wait for asynchronous work. If an effect or promise controls when content appears, use an async
act()boundary or a testing-library async query appropriate to the scenario. - Assert on behavior. Check accessible DOM output, text, or the interaction outcome. Avoid asserting implementation details that could change without changing the user-visible behavior.
- Unmount every root. Clean up the test-renderer tree and any independently created DOM roots. Remove test-created host elements, and ensure component cleanup runs.
- Investigate warnings instead of suppressing them. A missing
act()boundary is one possibility. A stale root, an unhandled asynchronous update, or an incorrectly managed effect can also be involved. Fix the cause rather than hiding console output.
Common mistakes
Wrapping only the outer render
An outer act() boundary does not prove that every independently managed root has been updated or cleaned up. Trace the child’s effect and find the actual root it creates.
Assuming the warning means the assertion failed
An act() warning is a signal that React observed an update outside the expected test boundary. It does not, by itself, tell you whether your assertion is wrong. Still, treat it as a test-quality issue: an uncoordinated update can make tests flaky or leave effects running after the test ends.
Using two renderers without a reason
A snapshot renderer and a DOM renderer answer different testing needs. Combining them can be justified for a legacy integration, but it creates extra lifecycle and cleanup work. If the test is about what a user sees, a DOM-based test is often clearer.
Copying an old act() import blindly
Older examples may import act from renderer-specific packages. Current React versions may expose a different supported API. Confirm the versions of react, react-dom, react-test-renderer, and your testing library, and follow documentation for that combination. Do not treat this guide’s sketch as a version-independent import recipe.
Forgetting effect cleanup
An independently mounted root must be unmounted. Otherwise, a test can leak DOM nodes or leave scheduled work that affects later tests. Keep cleanup in the component lifecycle and make sure the test actually unmounts the outer tree so that lifecycle cleanup runs.
Choosing the simplest test
Use a DOM test when the requirement is user-visible: text appears, a button is enabled, or a dialog is shown. Use an in-memory renderer only when the project has a concrete need for that representation. Combine renderers only when the component really crosses a renderer boundary and the test must cover that integration.
The rare multiple-renderer scenario is easier to reason about when root ownership is explicit. Name each root, know which component creates it, coordinate its updates with the supported act() API, and clean it up. If that explanation is hard to express in the test, the test may be combining responsibilities that should be separated.